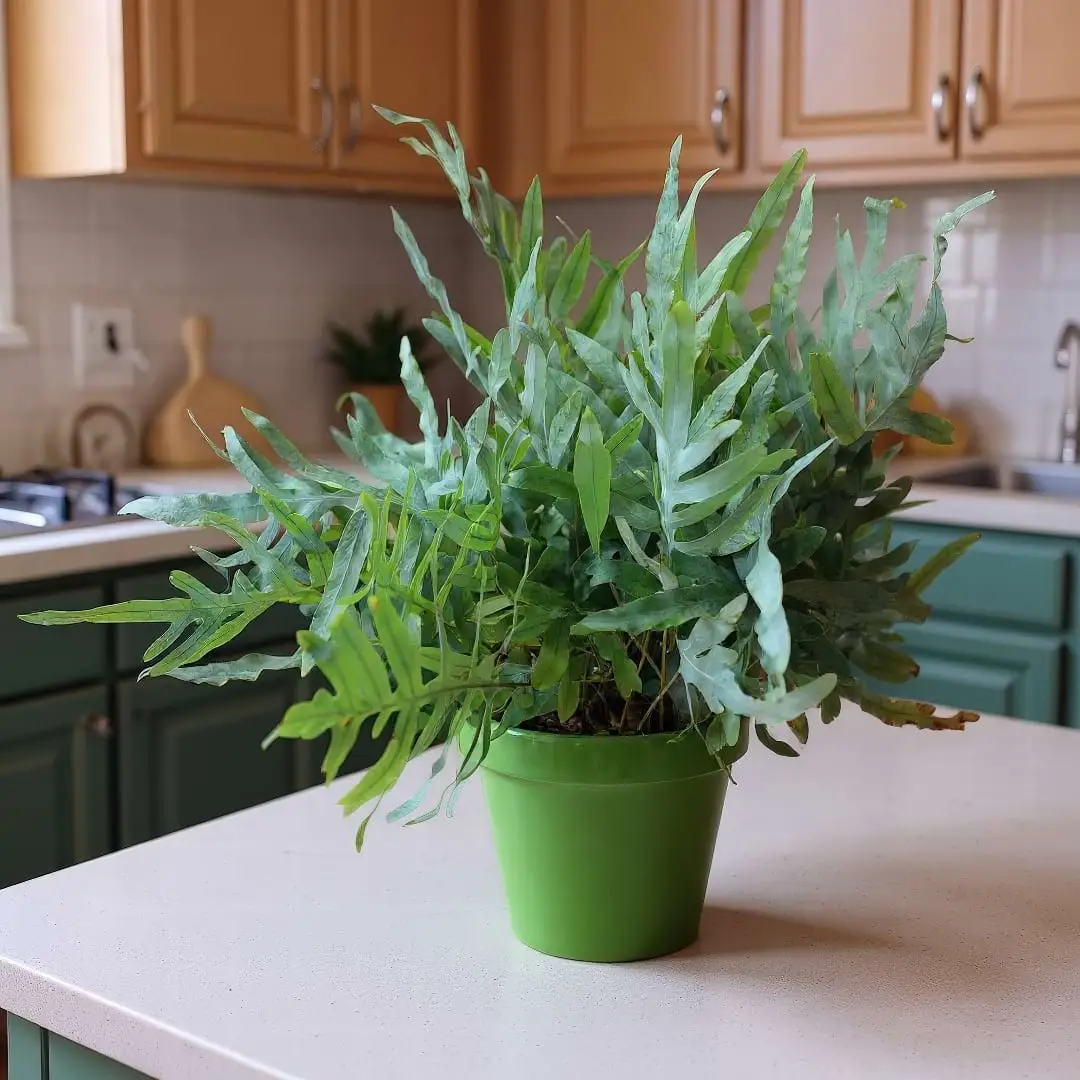
Button Fern
Pellaea rotundifolia
Round-leaved Fern, New Zealand Cliff Brake, Round Leaf Fern
Button Fern care gets easier when you treat it like a slightly tougher fern: bright indirect light, evenly moist soil, an airy mix, and steady humidity. This guide covers the exact routine that keeps Pellaea rotundifolia full, glossy, and compact indoors.
📝 Button Fern Care Notes
🌿 Care Instructions
⚠️ Common Pests
📊 Growth Information
🪴 In This Guide 🪴
☀️ Button Fern Light Requirements (Indoor Light Guide)
Best Light for Button Fern
Button Fern grows best in bright indirect light. Think of the soft, filtered light near a bright east window, or a spot a few feet back from a south or west window where direct rays do not sit on the fronds for hours.
This is not a deep-shade fern. It can tolerate medium light, but that usually means slower growth, wider spacing between leaflets, and a plant that never quite fills out. If you want the dense, glossy look that makes Button Fern so appealing, brighter is better as long as the light is indirect.
It also helps to understand why this fern feels a little sturdier than some others. The leaflets are thicker and more leathery than the paper-thin fronds on many common houseplant ferns, so Button Fern can handle a bit more brightness than the softest woodland species. For a broader explanation of how indoor exposure changes through the day, our light guide is worth reviewing.
Where to Place Button Fern Indoors
An east-facing window is the easiest placement. Morning sun is gentle, and the rest of the day stays bright without the harshest afternoon burn. A bright north-facing room can also work if the plant is close enough to the glass.
South and west windows are still usable, but add distance or a sheer curtain. When Button Fern gets too much direct sun, the leaflets do not just pale a little. They can bleach, crisp, and develop brown patches that never turn green again.
Rotate the pot every week or two so the clump grows evenly. Because Button Fern stays compact, it can lean toward the brightest side without you noticing until the whole plant starts to look lopsided.

Signs of Wrong Lighting for Button Fern
- Too Little Light: Sparse growth, longer gaps between leaflets, slower unfurling of new fronds, and a duller green overall.
- Too Much Direct Sun: Bleached patches, crispy brown tips, and fronds that feel brittle instead of flexible.
- Just Right: Tight, compact growth with glossy round leaflets and dark stems that keep arching rather than stretching.
If your home is dim in winter, move the plant a little closer to the window rather than dramatically changing the watering schedule. Low light and soggy soil together are what usually push a Button Fern downhill.
💧 Button Fern Watering Guide
How Moist Should Button Fern Stay?
Button Fern likes soil that stays evenly moist, not soaking wet and not fully dry. The easiest mental model is a wrung-out sponge. The mix should feel lightly damp through most of the root zone, with only the surface beginning to dry before you water again.
This is where people get tripped up. Because Button Fern is a little tougher than some classic ferns, growers often treat it like a semi-drought plant. It is not. Yes, it can bounce back from a mild miss better than a maidenhair, but repeated dry cycles show up as crispy edges, leaflet drop, and a clump that slowly thins out from the inside.
On the other hand, constantly saturated soil cuts off oxygen around the roots and leads quickly to root rot. Button Fern wants consistency, not extremes.
How Often to Water Button Fern
In most homes, Button Fern needs water when the top half-inch of the potting mix feels just barely dry. In active spring and summer growth, that might mean every 4-7 days in a small pot. In winter, especially in a cooler room, it will usually stretch longer.
Do not water by calendar alone. Pot size, room temperature, light, airflow, and the type of container all matter. A small plant in a warm bright bathroom can dry much faster than the same plant in a cool office.
If you want a simple system, check the surface with your fingertip every few days and combine that with the pot's weight. Our full watering guide explains how to read those signals without guessing.
Best Watering Method for Button Fern
Top watering is usually best. Water slowly over the entire surface until excess drains from the bottom, then empty the saucer so the pot never sits in runoff.
If the mix has dried unevenly and started pulling away from the pot edge, bottom watering can help rehydrate the whole root ball. Set the pot in shallow water for 10-15 minutes, then lift it out and let it drain fully.
Room-temperature water is ideal. Extremely cold water can shock roots, while very hard tap water may leave mineral residue on the soil surface over time. If your frond tips keep browning despite correct humidity and watering, poor water quality is worth considering too.
Seasonal Watering Changes for Button Fern
- Spring: Growth restarts, and the plant begins using water more steadily.
- Summer: Warm rooms, brighter days, and more air movement mean the mix dries fastest.
- Fall: Growth slows gradually, so start lengthening the interval between waterings.
- Winter: Keep it moist, but check more carefully before watering because cooler rooms and weaker light slow evaporation.
A moisture meter guide can help if you struggle to judge dampness in the middle of the pot, but you still need to use it thoughtfully. Button Fern does not want a permanently wet reading either.
🪴 Best Soil for Button Fern (Mix and Drainage)
What Kind of Mix Does Button Fern Need?
Button Fern wants a mix that does two things at once: hold enough moisture to keep the roots evenly damp, and stay airy enough that oxygen can still move through the pot. Dense regular potting soil usually fails on the second point, while very chunky epiphyte mixes fail on the first.
The best Button Fern soil is a moisture-retentive fern mix built around peat moss or coco coir, with enough bark and perlite to keep it open. If you are unsure where to start, our soil guide covers why texture matters as much as ingredients.
You want the finished mix to feel springy and light in your hands, not muddy or compacted. When watered, it should darken and hold moisture evenly, but excess water should still run out quickly.
A Reliable DIY Button Fern Soil Recipe
This recipe works well for most indoor setups:
- 2 parts peat moss or coco coir for moisture retention
- 1 part fine orchid bark or pine bark fines for structure and airflow
- 1 part perlite or pumice for drainage and oxygen
- Optional: a small handful of worm castings or compost for gentle nutrition
Fine bark matters more than coarse bark here. Button Fern roots are smaller and finer than the roots on larger aroids, so you want structure without turning the whole pot into a chunky cage.
If your home is very dry or you forget to water, increase the coir or peat slightly. If you tend to water too often, increase the perlite a little instead.
Best Pot Type for Button Fern
Pot material changes how forgiving your watering margin feels.
- Plastic or glazed ceramic: Best if your air is dry or you tend to underwater. These hold moisture longer.
- Terracotta: Best if you water heavily or your room stays very humid. It dries faster through the pot walls.
- Shallow, wide pots: Often suit Button Fern better than deep containers because the clump spreads outward more than it dives downward.
Whatever pot you choose, drainage holes are non-negotiable. A humidity-loving fern still needs water to leave the container after each thorough soak.
🍼 Fertilizing Button Fern
How Much Food Does Button Fern Need?
Button Fern is a light feeder. It does not need constant fertilizer, and too much is more dangerous than too little. Overfeeding usually shows up as scorched tips, salt crust on the mix, and roots that stop performing well.
During spring and summer, feed once a month with a balanced liquid fertilizer diluted to half strength or even quarter strength. If you recently repotted into fresh mix, wait a few weeks before feeding again because new soil already contains some available nutrients.
If you want a broader refresher on houseplant nutrition, our fertilizing guide covers the logic behind dilution and timing.
How to Avoid Fertilizer Burn on Button Fern
- Water the plant first, then fertilize moist soil.
- Feed only in active growth, usually spring through late summer.
- Skip fertilizer entirely in winter unless the plant is actively growing under unusually strong light.
- Flush the pot with plain water every few months if you fertilize regularly.
Button Fern is not trying to become a giant specimen. You are feeding for steady healthy replacement growth, not explosive size.
🌡️ Button Fern Temperature Range
Best Room Temperature for Button Fern
Button Fern is happiest in average indoor temperatures between 60-75°F (15-24°C). That range keeps the roots active without pushing the plant into a hot, thirsty state that is hard to support indoors.
It actually appreciates the cooler side of normal household conditions more than many tropical foliage plants. A bright room that stays fresh and evenly temperate usually suits it beautifully.
Cold and Heat Stress to Avoid
Button Fern dislikes temperature swings more than it dislikes modest coolness.
- Below about 50°F / 10°C: Growth slows sharply and fronds may brown or drop.
- Cold drafts: Open winter windows and drafty entryways can damage exposed fronds quickly.
- Heating vents and radiators: These dry the air and the pot at the same time, which is a double hit for a fern.
- Hot glass: Summer sun through a window can overheat leaflets even if the room itself feels comfortable.
If your fern is suddenly declining and the watering seems right, check its exact placement. A plant beside a heater or pressed against cold glass can unravel fast.
💦 Button Fern Humidity Needs
How Much Humidity Does Button Fern Want?
Button Fern grows best above 50 percent humidity, and it looks noticeably better as humidity climbs into the 55-70 percent range. The round leaflets may be sturdier than those on many ferns, but they still lose moisture through a large amount of thin surface area.
When the air is too dry, the first warning signs are usually brown leaflet edges, a dull surface sheen, and older fronds that shed from the inside out. If the dryness continues, the whole clump starts to look wiry and sparse.
Our full humidity guide explains why many forest-floor plants decline even when their watering schedule seems technically correct.
Best Ways to Raise Humidity for Button Fern
The most reliable options are the same ones that work well for other woodland plants:
- Humidifier: The cleanest, most consistent fix, especially in heated winter rooms.
- Plant grouping: Several plants together slow moisture loss and create a small humid microclimate.
- Pebble tray: Helpful as a support measure, though not as powerful as a humidifier.
- Bright bathroom placement: Excellent if the light is strong enough.
- Terrarium or cabinet setup: Great for small plants that need very stable air moisture.
Daily misting can make the fronds look refreshed, but it is not strong enough on its own to solve chronically dry air. Think of misting as a cosmetic boost, not a full humidity system.
Why Button Fern Loves Terrariums
Button Fern is one of the better terrarium ferns because it stays compact, tolerates a shallow root zone reasonably well, and visually suits a woodland composition. It also appreciates the stable humidity that glass creates.
That said, it still needs airflow. In a sealed setup with heavy condensation and stale air, you can trade dry-air damage for fungal problems. The best terrariums for Button Fern are bright, airy, and lightly moist rather than swampy.
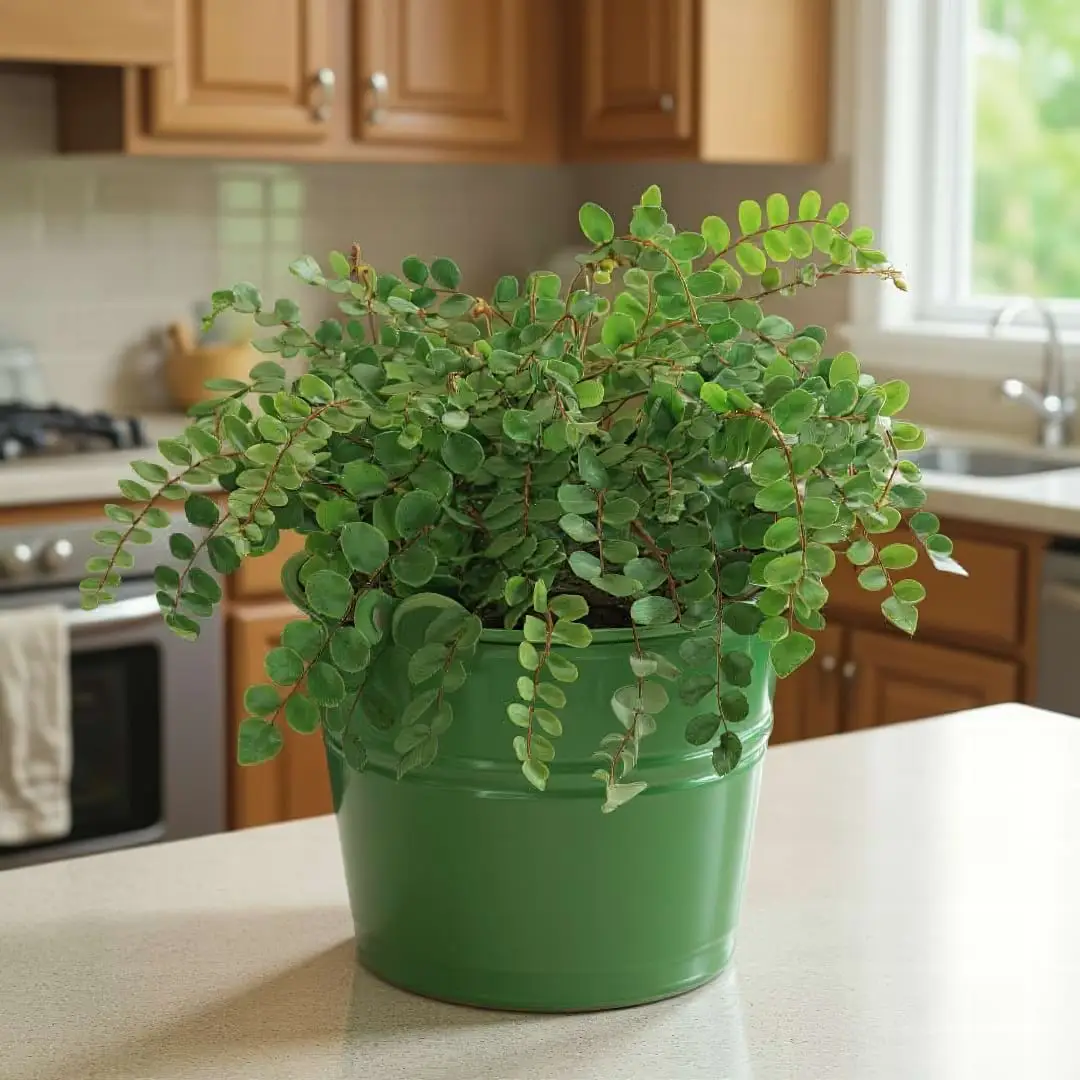
If you love the same rounded texture but want a softer, lighter-green partner, Lemon Button Fern is another good candidate for humid displays.
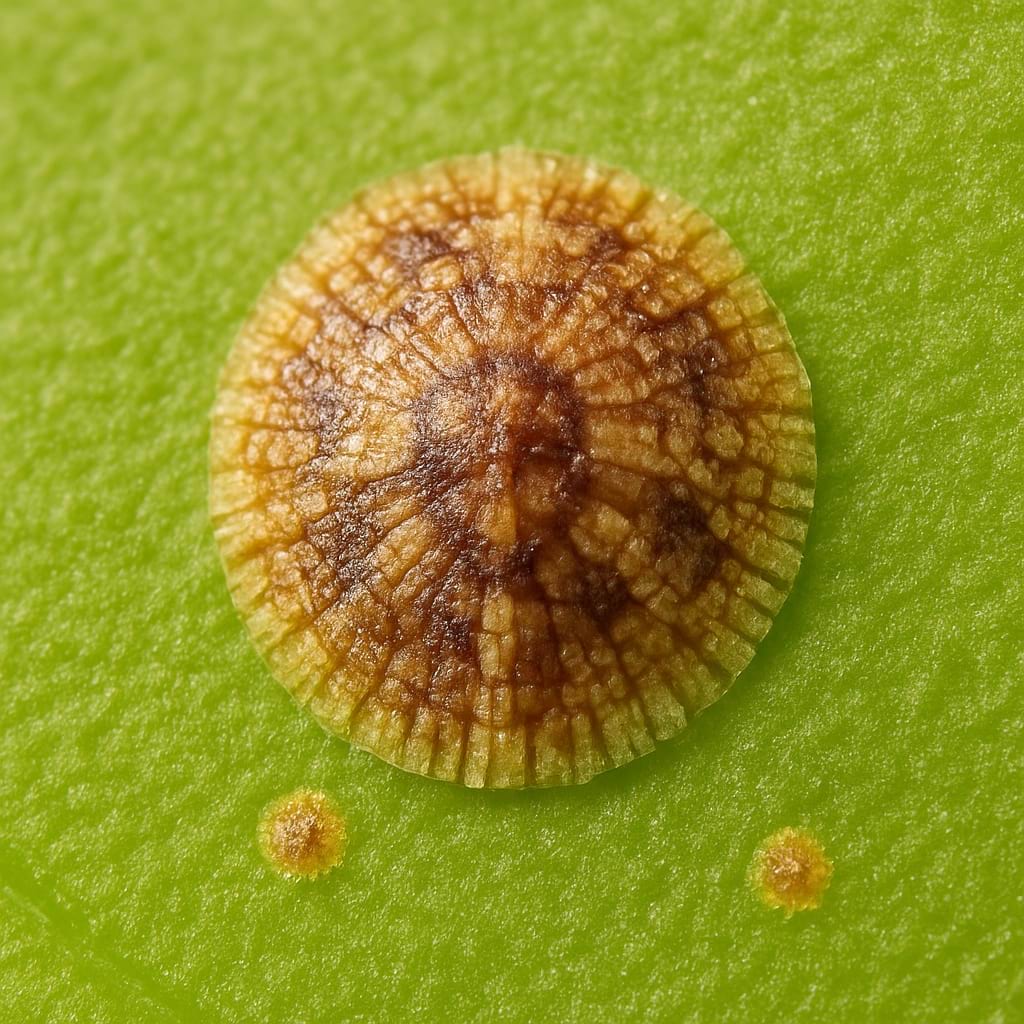
🌸 Do Button Ferns Bloom? (Spores and Sori Explained)

Button Fern Does Not Produce Flowers
Like all true ferns, Button Fern does not bloom. There are no flowers, no petals, and no seeds. Instead, the plant reproduces by spores.
That matters because new growers often think the brown spore structures on mature leaflets are a pest problem. They are not. On a healthy Button Fern, spores are just a normal sign that the frond has matured.
What the Brown Dots Mean on Button Fern
Those brown reproductive structures are called sori. On Button Fern, they form along the underside edges of mature leaflets and can look like tidy lines or dotted bands depending on the frond stage.
Healthy sori are dry, organized, and attached as part of the leaf structure. They do not rub off like soil, they do not crawl like insects, and they are not random blotches like disease.
If the brown areas are mushy, irregular, or spreading across the top surface of the frond, that is a different conversation and may point to stress or spotting rather than spores.
Can You Grow Button Fern from Spores?
Yes, but most indoor growers should not start there. Spore propagation is slow, fiddly, and easy to contaminate. Division is much faster and much more reliable for getting another healthy plant.
Still, if you enjoy the science of ferns, Button Fern can be a fascinating species to experiment with because the life cycle is so different from seed-grown houseplants.
📃 Button Fern vs Similar Ferns

Button Fern vs Lemon Button Fern
These two plants are confused constantly because of the shared common name, but they are not the same fern.
True Button Fern is Pellaea rotundifolia. It has darker, rounder, firmer leaflets on thin dark stems, and the overall clump looks a little more wiry and architectural. Lemon Button Fern, by contrast, is a Nephrolepis cultivar with softer fronds, lighter foliage, and a faint citrus scent when brushed.
If you want the plant that looks tidiest in a small terrarium or shallow tabletop pot, true Button Fern usually wins. If you want a softer, fluffier mini-fern look, Lemon Button Fern is often the better match.
Button Fern vs Heart Fern
Heart Fern is another compact fern with rounded leaf shapes, but the resemblance ends quickly up close. Heart Fern grows simple heart-shaped leaves from a creeping rhizome, while Button Fern makes compound fronds lined with multiple small leaflets.
Heart Fern also tends to read glossier and broader in displays, while Button Fern looks finer, darker, and more woodland-like.
Why Button Fern Feels Tougher Than It Looks
Compared with very delicate ferns, Button Fern handles short periods of lower humidity or slight drying a bit better because the leaflets are firmer and less filigreed. That toughness is relative, though.
It is still a fern. If you repeatedly let it dry hard, keep it next to a heater, or drown the roots in dense soil, it declines just as surely as anything else in the category. What you get is a slightly wider margin for error, not a total personality change.
🪴 Potting and Repotting Button Fern
When to Repot Button Fern
Button Fern does not need frequent upsizing. In fact, it usually looks and behaves better when the pot is only modestly larger than the root mass.
Repot every 2-3 years, or sooner if you notice one of these signals:
- Water races through the pot and the plant dries out much faster than it used to.
- Roots are circling heavily or pushing through the drainage holes.
- The center of the clump is becoming congested and tired.
- New growth is weak even though light, humidity, and feeding are all on target.
Spring is the best time because the plant is ready to replace disturbed roots quickly.
Choose the Next Pot Size Carefully
Go up only one pot size, usually 1-2 inches wider. Oversized containers stay wet too long, and that is where many Button Fern repots go wrong.
If your goal is just fresh soil rather than a bigger footprint, you can often keep the plant in the same pot after trimming away spent outer roots and refreshing the mix. Our repotting guide explains how to think about size versus soil renewal.
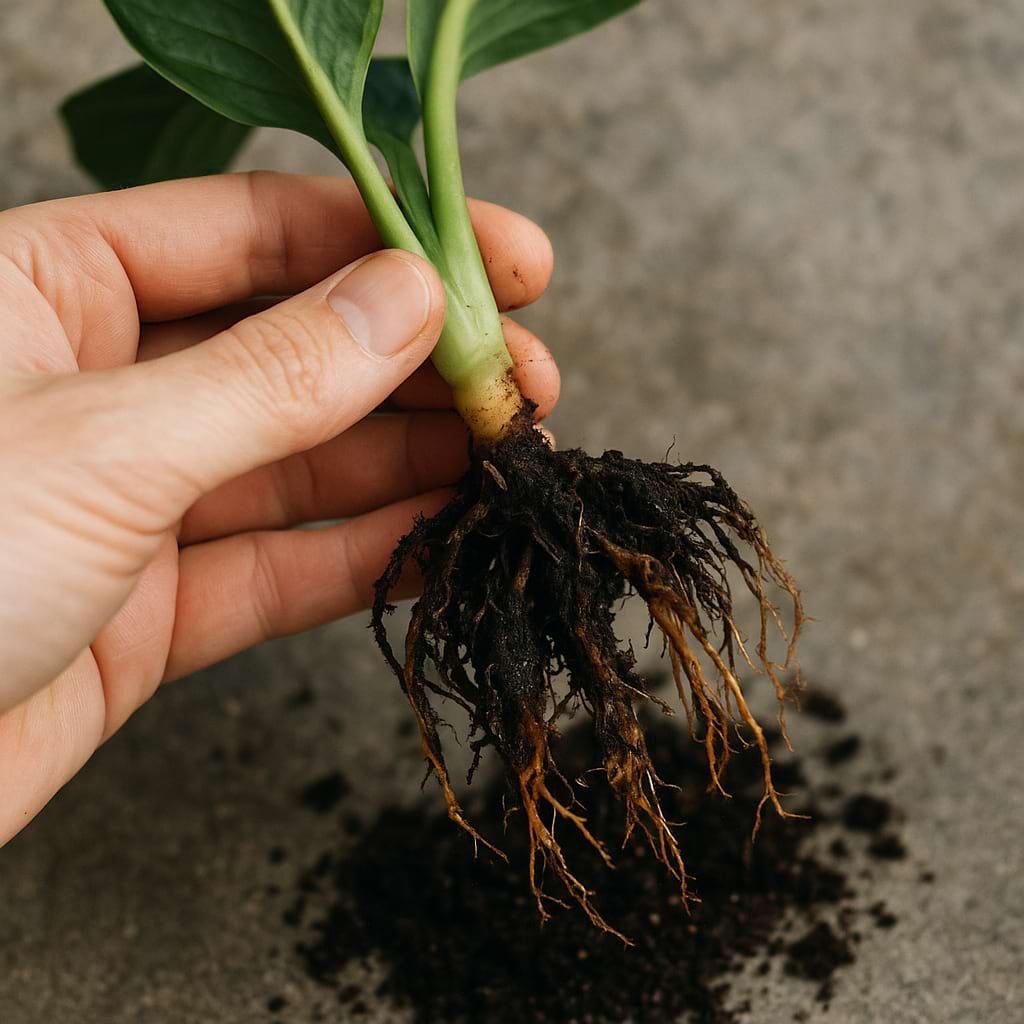
How to Repot Button Fern Without Shocking It
- Water the plant the day before repotting so the root ball slides out more easily.
- Tip the pot sideways and support the crown with your fingers rather than pulling on the fronds.
- Gently loosen old mix from the outer edge of the root ball.
- Trim away any black, mushy, or sour-smelling roots with clean scissors.
- Set the plant into fresh mix at the same height it was growing before.
- Water thoroughly to settle the mix, then let excess drain completely.
After repotting, keep the plant in bright indirect light and avoid fertilizer for about a month. Fresh soil plus reduced root stress is enough work for the fern at one time.
✂️ Pruning Button Fern
What to Cut on Button Fern
Button Fern does not need shaping in the way a vining or shrubby plant does. Pruning is mostly about removing fronds that are clearly spent.
Cut off:
- fully yellow fronds
- fully brown fronds
- fronds damaged by drought, sun scorch, or pest attack
- old stems that have become bare and unattractive
Always cut at the base of the frond rather than trimming random leaflet tips. If a frond is mostly damaged, taking the whole thing off looks cleaner and encourages fresh replacement growth from the crown.
How to Keep a Button Fern Looking Dense
The best way to maintain a full clump is not constant pruning. It is prevention:
- keep humidity stable
- avoid full dry-outs
- give bright indirect light
- repot before the root ball turns into a hard dry sponge
When Button Fern starts thinning in the center, that is often a repotting or environmental issue, not a sign that you need to cut more.
🌱 How to Propagate Button Fern

Division Is the Best Way to Propagate Button Fern
If you want more Button Fern plants, division is the clear winner. A healthy mature clump can often be separated into two or more smaller plants during repotting, and each division already has roots, fronds, and a head start.
This method is much more practical than spores for ordinary indoor growers. If you want a broader overview of which plants respond well to this technique, the plant division guide is a useful companion.
Step-by-Step Button Fern Division
- Unpot a mature, healthy plant in spring.
- Shake away enough old soil to expose natural splits in the crown and roots.
- Use your hands first. If the clump is too tight, make one or two clean cuts with a sterile knife.
- Make sure each division keeps a fair share of roots and several healthy fronds.
- Pot each section into a snug container with fresh fern mix.
- Water lightly but thoroughly and keep the divisions in bright indirect light with high humidity.
New divisions usually pause for a short time before pushing fresh growth. That is normal. The goal in the first few weeks is stability, not speed.
Can You Propagate Button Fern from Spores?
Yes, but it is a project, not a shortcut. You need ripe spores, a sterile sowing surface, constant humidity, patience, and a willingness to work through a long fern life cycle that includes an early stage most houseplant growers never deal with.
If you enjoy propagation experiments, start with the general propagation guide for the mindset and setup, then move to spores knowing the timeline will be measured in months rather than days.
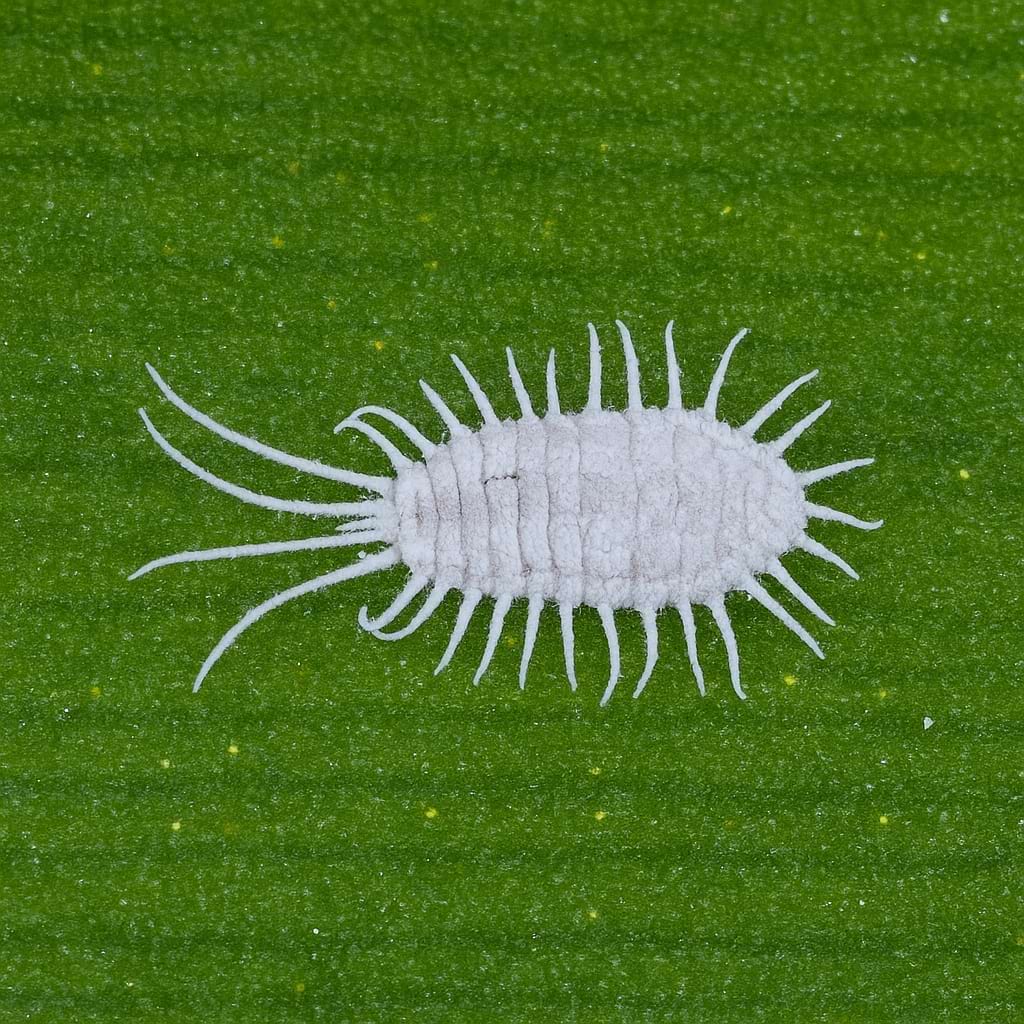
🐛 Common Pests on Button Fern
Pests to Watch for on Button Fern
Button Fern is not especially pest-prone when the environment is steady, but stressed plants attract the usual indoor suspects.
- Spider mites: Most likely when the air is too dry. Look for fine webbing and dusty stippling.
- Mealybugs: Hide where fronds meet the crown and on sheltered stems.
- Scale insects: Show up as hard brown bumps fixed to stems or leaf undersides.
- Fungus gnats: A sign that the potting mix is staying too wet for too long.
The fastest preventive step is keeping humidity healthy without keeping the soil swampy. Dry air encourages mites, while stale wet soil encourages gnats. Button Fern can suffer from both if care slips in opposite directions at different times.
If you spot pests, isolate the plant first. Then treat early and gently. Dense round foliage means infestations can hide in the center of the clump before the damage becomes obvious.

🩺 Button Fern Problems and Diseases

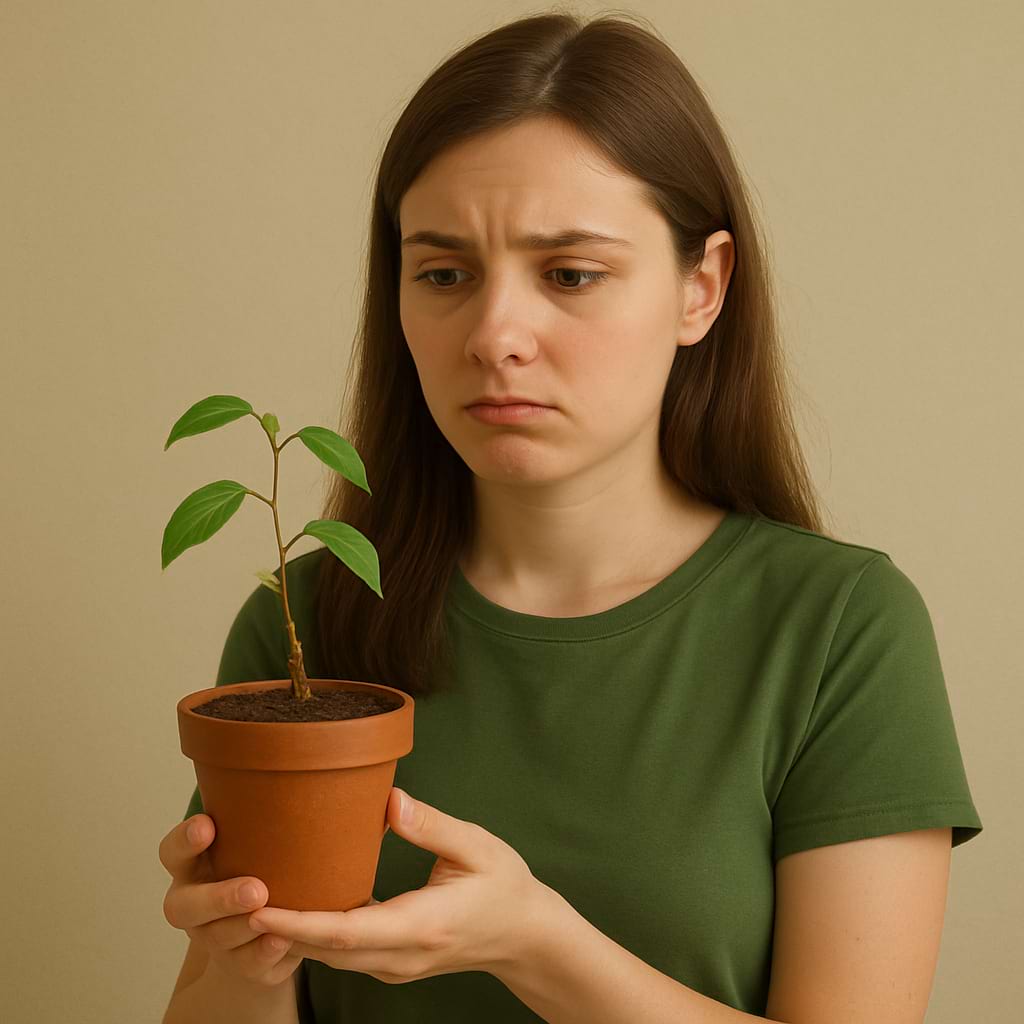
Troubleshooting a Struggling Button Fern
Most Button Fern problems come back to four variables: light, watering, humidity, and root condition. Once you diagnose which one drifted, the plant is usually straightforward to correct.
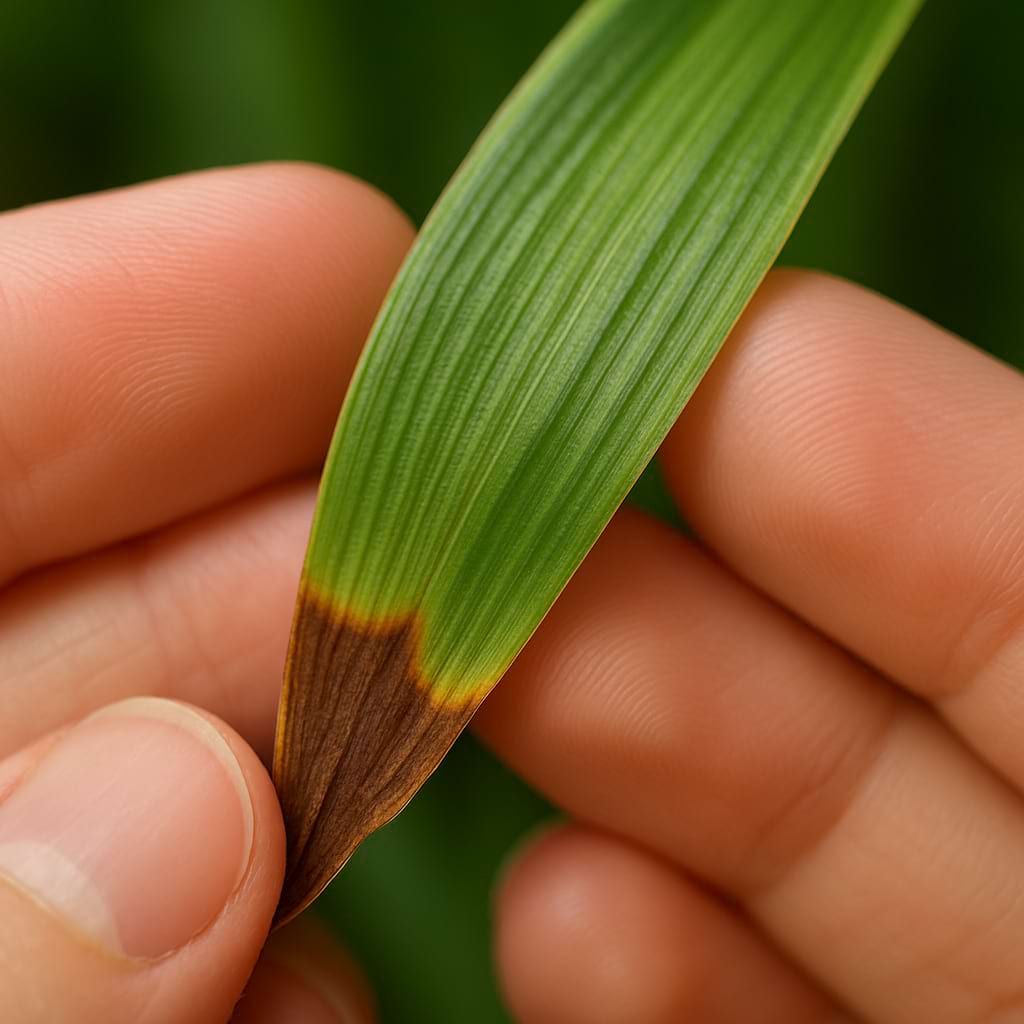
- Brown crispy edges: Usually low humidity, delayed watering, or mineral-heavy water.
- Yellowing leaves: Often overwatering, though exhausted old fronds can yellow naturally.
- Root rot: Common when the mix is dense, the pot is oversized, or the plant sits wet for too long.
- Stunted growth: Usually tied to low light, tight tired roots, or depleted soil.
- Leaf drop: Can happen after severe drying, cold shock, or root trouble.
- Pale faded leaves: Often too much harsh sun or a long period without feeding.
Quick Diagnosis for Button Fern
Use these patterns to narrow things down fast:
- Dry, crisp, papery damage: Think humidity and underwatering first.
- Soft yellow collapse: Think overwatering and root trouble first.
- Thin weak new growth: Think not enough light.
- Sudden decline after a cold night or draft: Think temperature shock.
Button Fern rarely fails "randomly." The symptoms usually make sense once you look at the plant's position in the room and the recent watering rhythm together.


🖼️ Button Fern Display Ideas

Where Button Fern Looks Best
Button Fern shines in places where its neat scale can actually be appreciated. Because it stays smaller and more structured than many fountain-form ferns, it works beautifully where larger species would feel floppy or oversized.
Some of the best placements are:
- bright bathroom shelves
- tabletop terrariums
- shallow ceramic bowls
- plant stands beside east-facing windows
- mixed fern collections where texture contrast matters
It is also one of the nicest plants for adding a woodland feel to a room without committing to a huge hanging basket.
Best Plant Partners for Button Fern
Button Fern pairs well with other compact humidity lovers. Try it with Heart Fern for a glossy broad-leaf contrast, Lemon Button Fern for a softer lighter texture, Mother Fern for a lacy, arching counterpoint to the rounded leaflets, or Blue Star Fern if you want a bigger, more sculptural companion.
If you are planting a shared container, keep the potting mix and watering needs compatible. Button Fern hates being used as an accent inside a planter dominated by thirsty tropicals with dense soil.
🌟 Button Fern Care Tips (Pro Advice)
✅ Keep the mix evenly moist, not constantly wet. The best Button Fern growers are the ones who avoid extremes.
✅ Use brighter light than you think, but filter it. This plant gets fuller in strong indirect light than in gloomy corners.
✅ Prioritize humidity in winter. Heating season is when most healthy Button Ferns start crisping.
✅ Do not oversize the pot. A giant container plus a moisture-loving fern is an easy route to root rot.
✅ Refresh the soil before the clump declines badly. Repotting on time is easier than rescuing a tired root ball later.
✅ Water quality matters if tips keep browning. Hard tap water can add to dryness stress.
✅ Inspect the center of the clump regularly. That is where pests and old rot-prone debris can hide first.
✅ Use Button Fern when you want a fern that stays tidy. It is excellent for smaller spaces where Boston Fern would overwhelm the display.
✅ Treat terrariums as bright humid rooms, not sealed bogs. Stable humidity helps, but stale wet air does not.
✅ If you are new to ferns, start here rather than with the fussiest species. Button Fern still asks for care, but it gives you a slightly wider margin for error in return.
❓ Frequently Asked Questions
Is Button Fern a good fern for beginners?
It is one of the better ferns for a motivated beginner because the leaflets are slightly leathery and less fragile than maidenhair-type fronds. That said, it still wants bright indirect light, even moisture, and decent humidity, so it is easier than many ferns, not neglect-proof.
Why is my Button Fern turning brown and crispy?
Brown crisping usually means the air is too dry, the root ball dried out too far, or both. Check humidity first, then make sure you are watering when only the surface starts to dry instead of waiting for the whole pot to go light.
Can Button Fern live in low light?
It can survive in medium light, but deep low light usually makes it thin, dull, and slow. It stays fuller in bright indirect light near an east window or a few feet back from a brighter south or west window.
How often should I water Button Fern?
There is no fixed schedule that works in every home. Most indoor plants need water when the top half-inch of the mix feels slightly dry. In summer that may be every 4-7 days, while winter may stretch longer.
Is Button Fern safe for cats and dogs?
Yes. Button Fern is generally considered non-toxic to pets, which makes it one of the friendlier fern options for homes with curious cats or dogs.
What is the difference between Button Fern and Lemon Button Fern?
True Button Fern is Pellaea rotundifolia, a cliff brake fern with darker, leathery round leaflets on wiry dark stems. Lemon Button Fern is a Nephrolepis cultivar with softer fronds, a lighter green color, and a faint citrus scent when brushed.
ℹ️ Button Fern Info
Care and Maintenance
🪴 Soil Type and pH: Moisture-retentive but airy fern mix, slightly acidic to neutral
💧 Humidity and Misting: Best above 50 percent. Stable humidity keeps the round leaflets glossy and prevents crisp edges.
✂️ Pruning: Trim yellow, brown, or exhausted fronds at the base. Avoid shearing healthy tips.
🧼 Cleaning: Rinse or mist gently to remove dust. Avoid leaf-shine products and rough wiping.
🌱 Repotting: Repot every 2-3 years or when the clump dries out too fast and roots crowd the pot.
🔄 Repotting Frequency: Every 2-3 years
❄️ Seasonal Changes in Care: Water a bit less in winter, keep it away from heating vents, and protect it from cold window glass.
Growing Characteristics
💥 Growth Speed: Slow to Moderate
🔄 Life Cycle: Perennial
💥 Bloom Time: Does not bloom
🌡️ Hardiness Zones: 9-11 outdoors in sheltered, frost-free climates; usually grown as a houseplant
🗺️ Native Area: New Zealand
🚘 Hibernation: No
Propagation and Health
📍 Suitable Locations: Bright bathrooms, terrariums, desktops, shelves, and shaded patios in mild climates
🪴 Propagation Methods: Best propagated by division during repotting; spores are possible but slow and fussy.
🐛 Common Pests: Spider Mites, Mealybugs, Scale Insects, Fungus Gnats
🦠 Possible Diseases: Root rot, occasional fungal spotting when air is stagnant and soil stays overly wet
Plant Details
🌿 Plant Type: Fern
🍃 Foliage Type: Evergreen
🎨 Color of Leaves: Deep green
🌸 Flower Color: N/A
🌼 Blooming: Reproduces by spores instead of flowers
🍽️ Edibility: Not edible
📏 Mature Size: 8-15 inches
Additional Info
🌻 General Benefits: Compact size, pet-safe foliage, strong texture, and better short dry-spell tolerance than many delicate ferns
💊 Medical Properties: No commonly used household medicinal value
🧿 Feng Shui: Associated with calm, grounded growth and gentle woodland energy
⭐ Zodiac Sign Compatibility: Virgo
🌈 Symbolism or Folklore: Resilience, quiet steadiness, and sincerity
📝 Interesting Facts: Its small round pinnae are thicker and more leathery than the fronds of many common houseplant ferns, which is why it handles normal indoor life a little better than fussier species.
Buying and Usage
🛒 What to Look for When Buying: Choose a dense clump with firm dark stems, glossy leaflets, and no papery brown edges in the center.
🪴 Other Uses: Terrariums, mixed fern bowls, underplanting in large humid planters, and small hanging pots.
Decoration and Styling
🖼️ Display Ideas: Woodland-style terrariums, shallow ceramic bowls, bathroom shelves, and grouped fern displays.
🧵 Styling Tips: The dark stems and tidy round leaflets suit natural ceramics, mossy terrariums, and softer cottage or woodland interiors.
💬 Community
Start the first discussion.
Ask about Complete Guide to Button Fern Care and Growth
Ask a question or share what worked for you.
Log in to post.
Logged in as Member.
Log in to post your comment
Your draft stays here. Choose a sign-in method below.
Use Google or email. Your draft stays on this page.
🪴 See also 🪴